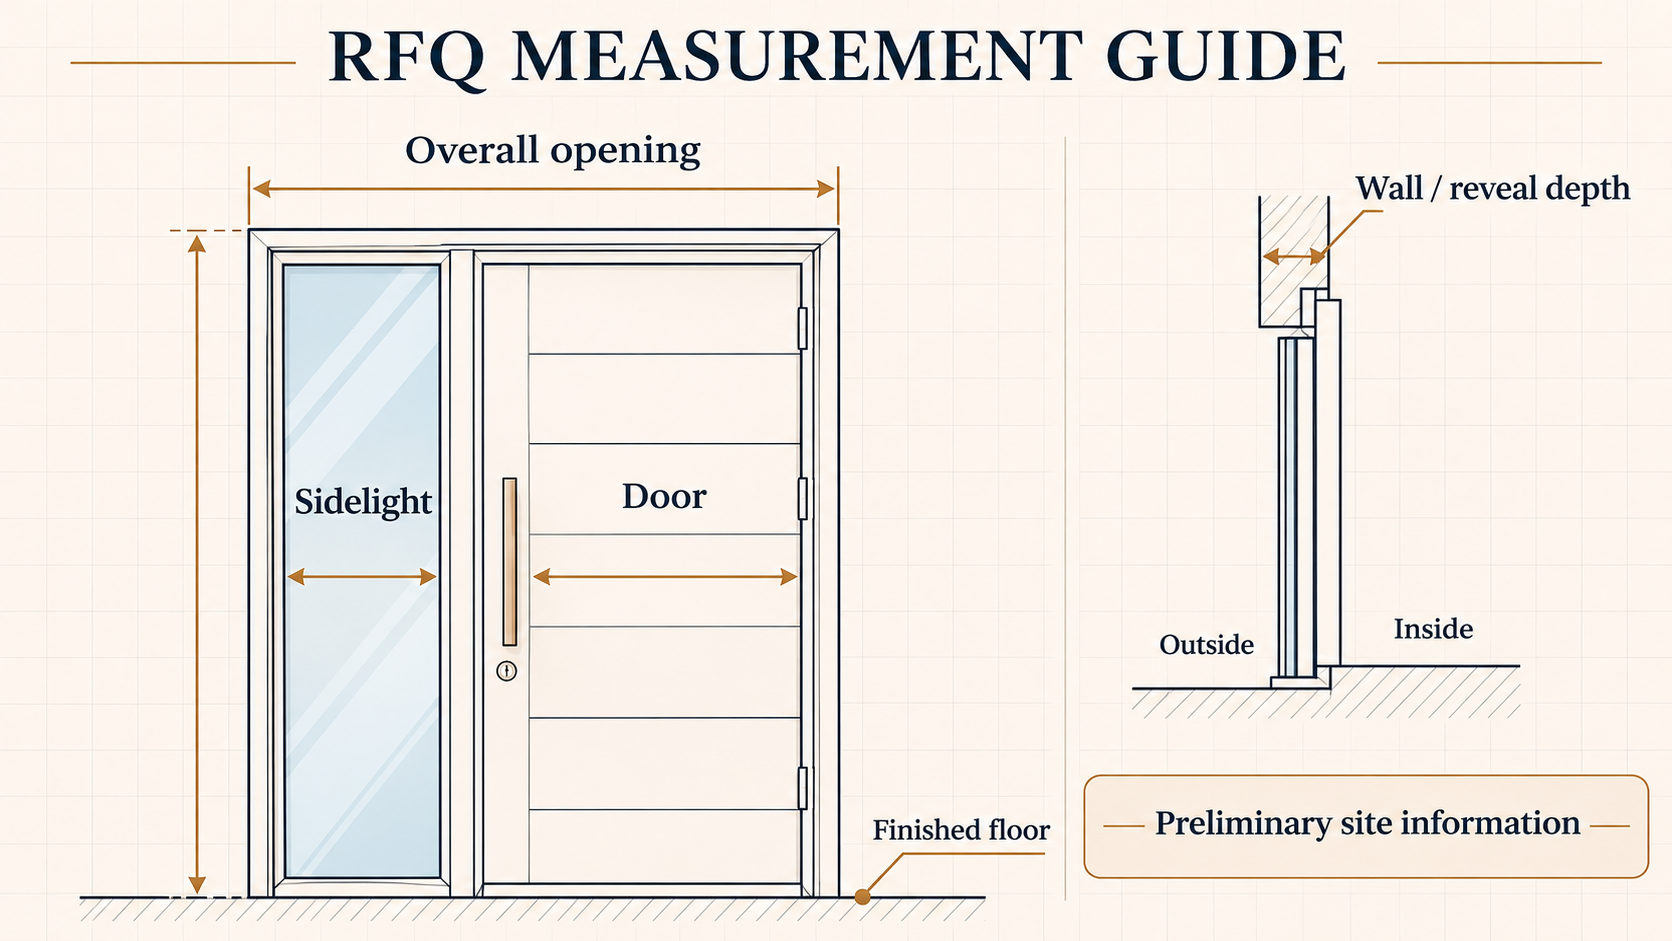
For an initial quote for an entrance door with a sidelight, send the overall opening width and height, a labelled door-and-sidelight layout, wall depth, finished floor levels, opening direction, photographs and project location. Mark the units and identify measurements that are preliminary.
The checklist below helps you assemble those items into a clear enquiry. The supplier and the responsible project professional can then confirm which dimensions and site conditions need further review.
If you are still comparing appearance and layout options, start with the residential entrance door overview. Use this guide when you are ready to assemble the measurement information for an RFQ.
Start by naming what you are measuring
Three measurements are often confused:
- Door leaf dimensions describe the moving door panel only.
- Door-unit dimensions describe the assembled door, frame and related components.
- Opening dimensions describe the available space in the building where the complete entrance arrangement is intended to fit.
A manufacturer’s dimensional and handing data illustrates how door-panel measurements, complete-unit dimensions and swing direction are recorded for a specific system.
For an early quotation, state which one you measured. If you are unsure, label the dimensions as “site opening—preliminary” and add photographs or a marked-up drawing. Do not subtract an assumed fitting allowance or convert the opening into a final manufacturing size yourself. The final relationship between the opening and the selected door system needs project-specific confirmation.
1. Record the full entrance width and height
Measure the complete entrance zone rather than the door leaf alone. For a door with one sidelight, this usually means recording the overall width across the door and sidelight area. If there are sidelights on both sides, show each side separately. If an upper glazed panel or transom is planned, include it in the overall elevation.
For the first enquiry, provide:
- overall available width;
- overall available height;
- door position within that width;
- sidelight position—left, right or both sides;
- whether an upper panel or glazing zone is included;
- the unit used for every measurement.
A simple front-view sketch is often clearer than a list of numbers. Mark the door, sidelight and any upper panel as separate rectangles, then write the approximate dimensions beside them.
2. Show where the measurements were taken
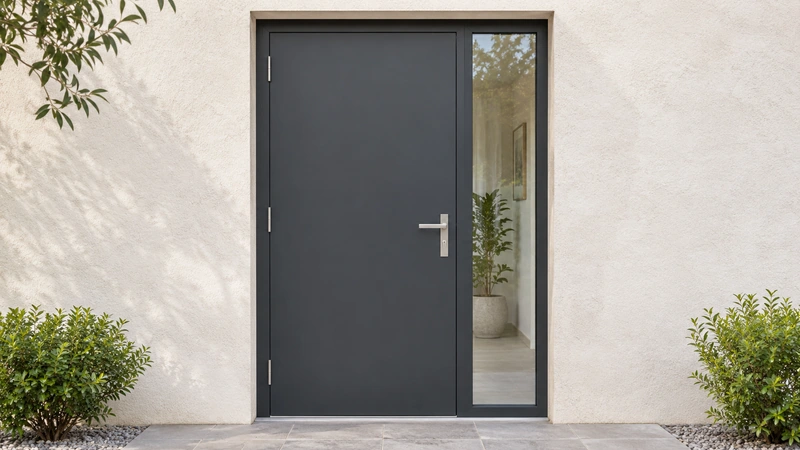
Openings may not be perfectly uniform. Instead of sending one unexplained width and one height, note where each reading was taken. A useful preliminary record includes widths near the top, middle and bottom, plus heights at more than one position.
These readings are not a substitute for a professional site survey. They help reveal whether the opening may need further checking before the entrance system is finalized. Do not average inconsistent readings or hide a difference; show the readings and let the responsible project team decide what additional verification is required.
3. Record finished floor levels inside and outside
The entrance must be coordinated with the floor level on both sides. State whether the floor finishes are complete, planned or still unknown. Include:
- the internal finished floor level;
- the external landing or paving level;
- any visible step, threshold or level change;
- the expected thickness of a floor finish that has not yet been installed;
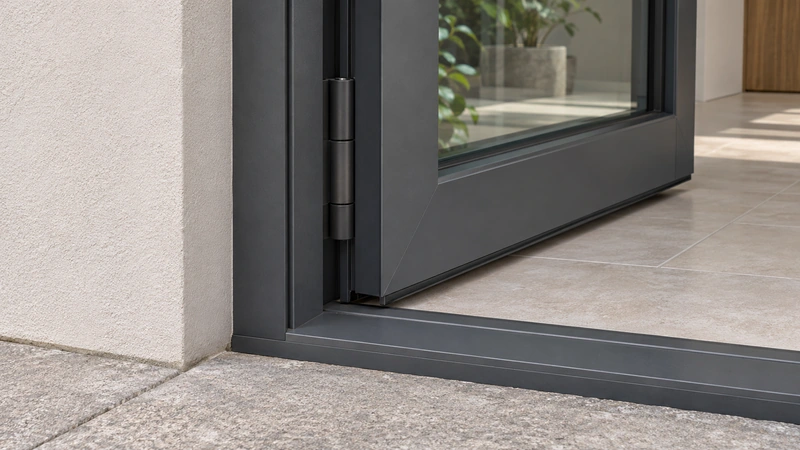
- a side-view photograph showing the base of the opening.
This information helps keep the first review grounded in the real entrance condition. Threshold design, drainage, accessibility and installation details remain subject to the selected system, site conditions and applicable project requirements.
4. Measure the wall or reveal depth
Record the depth of the wall or entrance reveal where the frame is expected to sit. If the inside and outside finishes create different depths, show both conditions with a side-view sketch or photograph.
Also identify visible finishes around the opening, such as render, stone, tile, cladding or trim. Do not assume that a decorative finish is part of the structural opening. The quotation team needs to know what is already built, what is decorative and what may still change.
5. Define the sidelight layout
“Door with sidelight” can describe several different arrangements. A useful brief answers the following questions:
- Is the sidelight on the left, right or both sides when viewed from outside?
- Is it intended to be fixed glazing or another configuration that still needs discussion?
- Should the sidelight align with the full door height?
- Is an upper glazed panel part of the same entrance elevation?
- Are there privacy, appearance or daylight preferences that should be noted?
Use the same viewing direction throughout the brief. Writing “viewed from outside” on the sketch prevents left and right from being interpreted differently.
6. State the opening direction and everyday use
Show the door swing with an arrow on a top-down plan sketch, and label the interior, exterior and hinge side. Add an outside-view photograph or elevation so the supplier can match the plan to the entrance.
Add the practical context:
- preferred inswing or outswing, if already decided;
- where people approach from;
- nearby walls, cabinets, steps, gates or furniture;
- whether the entrance needs to coordinate with an intercom, access-control device or smart lock;
- preferred handle position and style.
These are briefing inputs, not confirmation that every option is compatible or included. Hardware, access control and the final opening arrangement must be checked against the selected door system and quotation scope.
7. Photograph the entrance systematically
Photos make preliminary dimensions easier to interpret. Include:
- a straight-on view of the complete entrance;
- an interior view looking toward the opening;
- an exterior view showing the approach and surrounding facade;
- close-ups of the head, both sides and the base;
- a side view showing wall depth and floor levels;
- any nearby obstruction or service that could affect access or operation;
- a reference image for the preferred appearance, clearly labelled as inspiration rather than the actual site.
Avoid using a wide-angle image as the only measurement record because perspective can distort proportions. Keep the written dimensions and sketch as the primary reference.
8. Add the project information that affects the review
Measurements alone do not create a complete RFQ. Add:
- country and city;
- project type and whether the entrance is new construction or a replacement;
- number of entrance units;
- current project stage;
- available architectural drawings;
- preferred finish direction or reference image;
- target timing, described as a planning target rather than a promised delivery date;
- the party responsible for final site verification and installation coordination, if known.
If the project is in the UAE or Saudi Arabia, state the exact project location and the local project requirements already identified by your consultant or contractor. Do not assume that one configuration or approval route applies to every city or project.
A compact RFQ checklist
Before sending the enquiry, check that the package contains:
- overall entrance width and height;
- door and sidelight layout marked on an elevation;
- measurement locations and units;
- internal and external finished floor information;
- wall or reveal depth;
- opening direction shown with a viewing side;
- full entrance, detail and context photographs;
- project location, quantity and stage;
- finish, handle, lock and access-control preferences;
- drawings or reference images, if available;
- a note identifying which dimensions are preliminary.
What happens after the first enquiry?
The initial information allows the entrance configuration to be reviewed and the missing questions to be identified. Final dimensions, components, hardware compatibility, performance requirements, delivery scope, installation responsibilities and local compliance still need to be confirmed in the project quotation and technical review.
Do not release a door for manufacture or begin opening alterations from this checklist alone. The final site condition should be verified by the responsible project professional and the selected supplier or installer under the agreed project scope.
When your sketch, photos and preliminary dimensions are ready, send them through the Contact & RFQ page. Include “entrance door with sidelight” in the project details so the enquiry can be routed to the right product review.